This page lists the locations in each floor.
Roblox Heroes Event
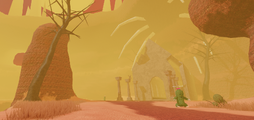
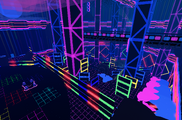
Destroyed Arcadia and the Goblin Hideout were two maps made for the Roblox Heroes Event. The former of the two, upon the defeat of the Orc and completion of the map, awarded the Galactic Helm Roblox accessory. The latter, upon the defeat of the Orc King and completion of the map, awarded the Incredibles 2 Backpack Roblox accessory.
Roblox Powers Event
The Catacombs were an area created for the Roblox Powers Event. The Catacombs were unique in that, rather than just being filled with mobs, they spawned wave after wave of mobs. There were ten waves total, with mobs from Floor 1 to Floor 5. The last enemy was Sa'jun (Catacombs)]]. Completing the Catacombs awarded players with Infinity Slash, a now-unobtainable dual-wielding skill and the Power Pauldrons Roblox accessory.
Snowflake Gorge
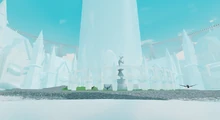
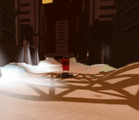
Snowflake Gorge was an event floor created by the Swordburst 2 development team independently for a Winter event. It was a snowy gorge with steep walls on all sides, filled with crystals and mysterious pillars. It was unique in that it had a brief underwater segment. Its boss was Wintula the Punisher.
Egg Realm
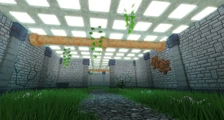
The Egg Realm was a little map created for an Easter event. Like Snowflake Gorge, this was not for a Roblox event, instead being specific to Swordburst 2.
Spooky Hollow
Spooky Hollow 2022 was a Halloween themed map inspired by "The Legend of Sleepy Hallow" by Washing Irving. The event was added in late October, 2023, in time for Halloween, but stayed open until December 10th. It was accessed via an orange portal next to the Floor 2 spawn. The main boss, the Headless Horseman, was located in the "Saint Inn", a church-like building at the top of a hill, surrounded by a graveyard. The Spooky Hollow Shop was located in a small building next to the spawn pad. Four common weapons could be purchased. This event was unique in that it introduced a large number of new, very powerful items. Every single item (including the commons, at first) was more powerful than the strongest, non-limited weapons. This event was also significant in that it introduced the "burst" rarity. Five burst items were added, with each one requiring a corresponding weapon/armor from the event alongside several other items. This event, like Snowflake Gorge and the Egg Realm, was not for a Roblox event, instead being specific to Swordburst 2.
Spooky Hollow 2023 was a Halloween themed map by Washing Irving. The event was added in late October, 2023, in time for Halloween. It is accessed via an orange portal on the Floor 2 corner. The main boss, the Headless Horseman, was located in the "Saint Inn".
Winter Event 2022
This event took place in the Freezing Lake within Avalanche Expanse. It featured a large amount of content returning from the previous Snowflake Gorge event as well as some new content.
Frosty Fields
The Frosty Fields is a limited-time exclusive Swordburst 2 event map. accessible by touching the frost portal in Helmfirth.
Virhst Woodlands
The Virhst Woodlands were released in Early Access and are the first floor in Swordburst 2. This floor is accessible to players from the beginning of the game and is where they first spawn.
Virhst Woodlands contains four main areas: Wolves' Domain, Ruined Maze, Decaying Maze, and Kobold Quarter. Wolves' Domain is a small island off of the beach inhabited by the Dire Wolf. Ruined Maze is a small maze found at the top of the huge wall, within which are several Ruined Kobold Knights and Crimsonites and, at the end, the Ruined Kobold Lord. Within the tower, the Decaying Maze, is a medium-sized maze, at the end of which is the Kobold Quarter, containing the main boss of the floor, Rahjin the Thief King.
This map has been remastered twice.
Arcadia
Arcadia is a small town with many marketplaces for players of all levels. Arcadia has Novice, Intermediate and Advanced Shops, as well as a Forge for dismantling and upgrading and several dummies to test damage with.
This map has been remastered twice.
Battle Arena
The Battle Arena is a social floor designed for free-for-all PvP battles and tournaments. Traders are also commonplace.
Redveil Grove
Redveil Grove was released in Early Access and is the second floor in Swordburst 2. Access to this floor is granted to players when they defeat Rahjin the Thief King. It's a dark, serene, Autumn grove, dense with trees and surrounded by towering cliff-faces.
Redveil Grove has one miniboss, the Pearl Guardian, within the Deep Copse. Inside Redveil Tower, there is a maze of corridors and rooms that leads the boss room containing Borik the BeeKeeper. The correct path can be found by following the white torches on the walls.
This map has been remastered twice.
Avalanche Expanse
The Avalanche Expanse was released in Early Access, announced on May 1st and released on July 21st, and is the third floor in Swordburst 2. Access to this floor is granted to players when they defeat Borik the BeeKeeper. It is a small, wintry region with several lakes and steep cliffs underneath a gigantic super-moon that makes the night as light as day.
Avalanche Expanse contains multiple areas: the Freezing Lake, Chilling Peak, Barren Cave, Snowman's Peak and Frozen Tundra. Each of these areas have different geography and assorted enemies. Every mob located on this floor has the possibility of dropping at least one item.
- When it was released, this was deemed by the developers to be one of the hardest floors to release due to various obstacles faced during development.
This map has been remastered twice.
Hidden Wilds
The Hidden Wilds were released after Early Access and are the fourth floor in Swordburst 2. This floor is the first non-Early Access floor, accessible by players when they defeat Ra'thae the Ice King. It is set in a dense jungle, complete with a small beach and sets of ruins.
In the Hidden Wilds, the spawn pad is located in Paradise Cove. Inland from the beach are the Ivory Wilds and, after that, The Ever Reaching Tropics, which lead to the Rotted Ruins. In the top left of these ruins is the Rotted Guardhouse, a little dungeon containing the Rotling, though to the top right is a trail that leads over a log bridge. This path leads to the boss dungeon, the Catacombs. In this dungeon is a large number of thin, winding chambers filled with mobs that eventually lead to the Lion's Throne Room, holding Irath the Lion.
This map has been remastered twice.
Desolate Dunes
The Desolate Dunes were released in the Version 40 update and are the fifth floor in Swordburst 2. Access to this floor is granted to players when they defeat Irath the Lion. It is a gigantic canyon at the heart of a blazing desert with a great chasm at its core. Its theme is very similar to Floor 5 in Swordburst Online.
Crossing the first rope bridge in front of the spawn pad leads to a cliff edge that can be dropped down from to progress through a natural arch and into a wide, open area. Heading forwards leads through Oasis Valley. Turning right at the chasm will lead towards a medium-sized mound with some stone spikes around it, upon which is the entrance to the Scorpion's Dwelling, home of the Fire Scorpion. Turning left, however, leads to a second, larger rope bridge that allows players to cross the chasm and move onwards, up the hill, through the Barren Cave and then into the Centaurian Province and the palace that serves as the floor's dungeon. Within it is a maze of corridors and locked doors, at the end of which is Sa'jun the Centurian Chieftain.
This map has been remastered twice.
Helmfirth
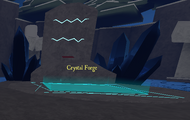
Helmfirth is the sixth floor, being released after the Desolate Dunes. Access to this floor is granted to players alongside the Entoloma Gloomlands when they defeat Sa'jun the Centurian Chieftain. It is a small, festive town surrounded by large walls. Helmfirth features two shops and a large forge for dismantling and upgrading equipment. Unique to the floor is the Crystal Forge, which allows combining several crystals into one of the next tier. Past the forge and shops is a small battle arena.
- Players who had Helmfirth unlocked before the Entoloma Gloomlands release had to defeat Sa'jun the Centurian Chieftain again to unlock the next Floor.
The shops have equipment for Levels 52, 55 and 67.
Entoloma Gloomlands
The Entoloma Gloomlands are the 7th floor in Swordburst 2. Access to this floor is granted to players alongside Helmfirth when they defeat Sa'jun the Centurian Chieftain. It is a gloomy, mushroom-filled swamp with heavy tones of purple and red.
The spawn pad for this floor is in a low-lying plain with red bodies of water and steep hills. Going through this area and then up the slope leads to a downward path that leads to two routes. To the left leads to the Frogazoid, the floor's mini-boss. To the right leads to the tower. The dungeon within the tower is a series of chambers with red grass and wavy paths that are linked through small, circular chambers. This eventually leads to the main boss room containing Smashroom the Mushroom Behemoth.
This map has been remastered twice.
Blooming Plateau
The Blooming Plateau is the 8th floor in Swordburst 2. Access to this floor is given to players when they defeat Smashroom the Mushroom Behemoth. It is a heavenly, floating island, full of gigantic, dense flora and stone ruins. It is based on Swordburst Online's Floor 7.
Spawned in an open area, players are located in the Divine Garden, overlooking a small lake and windmill. To the right side of the map is a staircase that leads to a small island with a steep hill, at the top of which is the Hippogriff. There is an identical staircase on the left side, however, it leads nowhere. Directly onwards is Bellesea Keep and Bellesea Peak. There is a large pad that teleports players to the Ruined Temple, a small area that leads straight to the tower. In the tower is the Mechanical Labyrinth. By following the cobblestone path, it is fairly easy to reach the Giant's Lair, the boss room of Formaug the Jungle Giant.
This map has been remastered twice.
Va' Rok
Va' Rok is the 9th floor in Swordburst 2. Access to this floor is given to players when they defeat Formaug the Jungle Giant. It is a hellish cluster of islands surrounded by an ocean of lava. The islands themselves are full of ruined buildings, rivers of lava and monstrous creatures.
Va' Rok's spawn pad is settled in a charred grassland at the base of Mount Braith, with a lava river in the center, splitting the land into two. Some distance ahead of the spawn point, just at the base of the mountain and to the right, is a small arena that is inhabited by the Polyserpant. Just downhill of this arena, to the right again, is a portal that leads to Mount Misery. Through this portal is another island with a large volcano, at the top of which is another portal, through which is a small plateau where the Gargoyle Reaper spawns.
The primary route is straight ahead of the arena structure and up the mountain, leading to the Roaring Summit. At the top of this is the tower, within which is the Burning Abyss and Twilight Cathedral. Venturing through these areas will take players to the Lair of Doom, the throne-room of Mortis the Flaming Sear.
Transylvania
Transylvania is the 10th floor in Swordburst 2. Access to this floor is given to players when they defeat Mortis the Flaming Sear. It is a dark, melancholic and nightmarish land, occupied en masse by sinister creatures of the night.
This floor's spawn pad is in the Forgotten Wash, a marshland surrounded by a forest and rocky hillsides. Travelling up the slope directly in-front of the spawn leads to the rest of the floor, though there is also a small, stone building built into the rockside to the right that is the Transylvania Shop, where weapons, shields and lanterns may be purchased. Past this shop is a small river with a rope bridge. Turning right directly after the bridge leads to a small slope and a little pathway, ending with some doors to Baal's Chamber, the mini-boss dungeon of Baal, The Tormentor. Going straight ahead after the bridge leads to Old Transylvania which, in turn, leads to the main city of Central Transylvania. This point is a cross-roads, allowing one of three routes to be chosen. The left path is a dead-end. It goes down Elm Street which ends with Mad Man's Manor. Likewise, the right path is also eventually a dead-end. It can lead either upwards, to the Mad Man's Mansion, or downwards, through the Mysterious Tunnel and into the Hidden Bay. The forwards path goes through more of the city and eventually to Upper Transylvania, the final area before the dungeon.
Upper Transylvania leads up to the mansion's entrance through various steep, uphill slopes.
The mansion itself begins in the Eve Citadel, a large chamber full of mobs. The door straight ahead leads to the Main Hall, a large sequence of corridors full of identical doors that lead to different rooms, being the Left Wing, the Library, Chamber 001, the Furnace Room and the Main Hall Staircase, which is found by continuously going right and then left until there are no more right turns available. This staircase leads to the Lair of Torment, the boss chamber of Grim the Overseer.
Hypersiddia
Hypersiddia is the 11th floor in Swordburst 2. Access to this floor is granted to players when they defeat Grim the Overseer. It is a gigantic, towering, cyberpunk city, full to the brim with powerful enemies.
Uniquely, there are two primary routes that lead to the dungeon.
The spawn pad is located at the top of a ramp, below which is the Mall. In this area, there is a purple-accented building to the far left that leads to the Disco Ballroom and, in the tower just to the left of the ramp, there is are elevator doors that lead to a large lobby. Following the main route means going down another ramp and through a pair of breaker doors, into the Lower Streets, an area infested with Reapers. By taking the second left turn and turning right through the cluttered road barriers, players may continue to progress and enter the HighwayIntersection, composed of two overlapping highway bridges. To get through this area, progress down the highway and, at the end, turn left and jump down to the other one below. At the end of this one is a large tunnel that leads to a small street. This area contains a bright doorway to the right which leads to an area composed nearly entirely of black girders. To continue progressing, go up the girder ramp and then follow the path lined with neon-green lights. When this path ends, turn left to go down the huge bridge.
Alternatively, it is possible to go backwards from the spawn pad and up into the Memorial. To progress, go past the memorial and up the black-and-red steps, into the tunnel. Then, go through the breaker doors and past the concert stage, entering the Cybernetic Citadel. At this point, go straight forwards and jump over the barriers in the first section of road. Then, traverse past the next road and, at the road after that, there are three options:
- Go straight forwards and into the magenta portal. This leads to the mini-boss room of Za, the Eldest
- Go straight forwards and then slightly to the left, past the green building behind the magenta portal. Then, go right and walk straight ahead until the green tunnel is visible. Then, go through this tunnel. This leads to the mini-boss room of the Duality Reaper.
- Turn left and go straight, through to the black tunnel which then leads to the Malware Gateway and into the girder section mentioned before. At this point, turn right and onto the huge bridge.
This huge bridge leads to the Miniboss Arena, containing the trio of Ra, the Enlightener, Ka, the Mischief, and Da, the Demeanor. On the right side of this arena is the Lair of Deceit, the boss dungeon.
To get to the boss room within the dungeon, first walk up the ramp and up onto the second tier. Then, turn right and through the neon doorway. From here, walk up the ramp onto the next tier and then walk to the left. This should lead to yet another ramp. At this tier, go towards the top right and ascend the metal staircase. Then, drop down and turn right, into the small doorway and into the maze.
While in the maze, take care to avoid the laser traps as they deal heavy damage on contact. In the first section of the maze, take the first right and then turn right again. Then, go through the metal doors. In the second section of the maze, take the second left and then turn right. Then, turn right again. After this, turn left and go straight on until the end of the corridor. At this point, take a left and then a right. At this point, go through the other set of metal doors. In the third section of the maze, simply turn right and go straight forwards to the end of the corridor. Then turn left and go up the slight ramp, going through the metal doors. This will lead to the boss area of Saurus, the All-Seeing.
Note that there are more locations than those mentioned above, just that these routes are the most effective routes to reach the mini-bosses and the boss.
Sector-235
Sector-235 is a sub-floor of floor 12, much like how Virhst Woodlands, Arcadia and Battle Arena are all floor 1. Access to this floor is granted to players when they defeat Saurus, the All-Seeing. The floor is a ruined city in the middle of a wasteland divided into multiple districts that players can venture through to find powerful entities throughout the map.
It has four minibosses each residing in their own, secluded areas of the map, with the exception of the Warlord and Limor the Devourer, which share a dungeon.
The boss is found in a dungeon past the Marshlands, where Suspended Unborn resides.
Atheon's Realm
Atheon's Realm is the other sub-floor of floor 12, functioning as an arena to fight the Super-boss/Boss raid: Atheon. This floor can be accessed through a door behind the main boss of Sector-235: Suspended Unborn.
Eternal Garden
Eternal Garden is a mini-floor (neither floor 12 nor floor 13) in Swordburst 2. Access to this floor is granted to players upon defeating Atheon. It appears to be a small, blossoming cherry tree forest.
